


How To Remove Gum From Your Car Seat
You’re driving along. It’s a nice summer day. The windows are down and a warm breeze circulates through the car as your kids sing along to that song everyone is dancing to on TikTok instead of trying to poke each other like usual. Everything seems perfect.
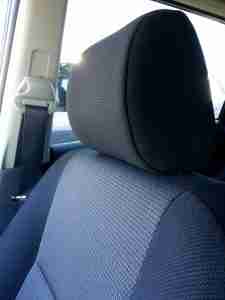
Until you pull into the driveway, open the door to get your bag out of the back and place your hand right into a sticky gooey pink piece of bubble gum, smack dab on the middle of the seat. Nasty!
Kids do a number on our belongings. In my house that’s what we call ‘why we can’t have nice things’. But alas, you’ve got to love them, right? You swear to all who is within earshot that gum is now outlawed in your vehicle even though you know that is a law you will be unable to uphold. Because, kids. And gum.
Ever wondered why gum is sticky? Gum contains polymers that makes it elastic so you can chew it. These polymers also give it it’s sticky substance. Our saliva can’t be absorbed by the gum because of these ingredients, however, anything that is not wet, squish. Stuck like chuck.
There’s nothing like stringy sticky bubble gum in a place it’s not supposed to be; the bottom of your shoe, your hair, on the dog’s tail, under a table (Gross! Who does that?!). But it’s especially bad when it’s in your car. Okay, maybe your hair would be worse.
Now how to get that sweet gooey mess off your upholstery.
Step 1 – Freeze and Remove!
Things you’ll need:
- Ice
- Plastic Ziploc bag
- Scotch Tape
- Some sort of dull blade or scraping tool
The first thing and most important step is to get the gum to harden. And no, I don’t mean wait for a couple of weeks until it’s a faded pink rock that has cemented itself to your seat for all eternity. Freeze it!
Get an ice cube or two or three, or better yet, put some in a bag to save your hand from freezing, and place on the gum. It’s okay if it melts and gets the seat wet. It’s just water. The goal here is to get rid of the stickiness.
Please note, patience is the key here. You do not want to start trying to remove the gum when it is still soft. It will stretch and stick and get ground into the fibers of your seat’s covering even worse than it already is. The last thing you want is a bigger mess on your hands.
If you have leather seats, once the gum hardens, place a strip of the scotch tape over the gum and remove. Repeat this with smaller hardened bits. DO NOT use a blade or scraping tool on your leather.
If you have upholstery, once the gum hardens, use your dull blade or scraping tool to scrape and chip away at the gum. There are several different things you could use here… putty knife, butter knife, window scraper, one of those handy dandy paint scrapers; anything with an edge that is dull enough that it won’t rip or fray your upholstery.
If the gum starts to soften during this process, stop and reapply the ice until it hardens again. Slow and steady wins the race!
Step 2 – Clean it up
Things you’ll need:
- White Vinegar
- Paper towels
- Sponge
- Carpet/Upholstery spot cleaner or degreaser
- Upholstery cleaner or leather conditioner
- Clean cloth or rag
Now that you’ve got all of the gum off the seat, there’s probably some sort of an oily gummy stain left behind. Not to worry. You’ll have that tackled in no time. Here you are going to harness the magical cleaning properties of white vinegar.
 First, moisten the sponge with vinegar and dab it on the stain. Soak up any excess vinegar with the paper towels. If there is any gummy particles that appear again, use the scraper from the previous step to remove them. Repeat with more vinegar if necessary.
When all particles seem to be gone and only the stain remains, you’ll want to use the spot cleaner or degreaser. It’s always advisable when you’re dealing with stain removal to test a cleaner on an inconspicuous area of the material to see how it will effect the appearance of the fabric. If there is any discoloration, you’ll want to test a different one. Once you’ve got something that won’t ruin the look of your seat, apply as directed.
Now that you’ve gotten the stain taken care of, it’s a good idea to clean the seat with an upholstery cleaner or leather conditioner depending on the type of covering that is on your seat. Again, it’s highly recommended that you spot test any cleaners on a hidden area of your surface first. Cleaner/conditioner on, and you should be all good. Gum be gone!
The steps above are just some of the ways you could go about this process. If you search the internet you’ll see posts about using peanut butter or egg whites and hey, they probably do work. But honestly, that seems like making an already sticky situation an even bigger disaster before it gets better.
We’ve all heard the old peanut butter in the hair trick to remove gum from your locks, but putting it on a car seat seems like making a mountain out of a mole hill. And egg whites?
Remember those polymers we talked about earlier? Well the type of polymers that cause the stickiness had the potential to be a thing of the past.
Several years ago, scientists in a British company called Revolymer tweaked the types of polymers used to create a gum that does not stick to surfaces and was biodegradable. The gum was called Rev7 and it hit stores in the US in 2010, but alas, it was withdrawn from the US market in 2012. Too bad it didn’t catch on. You might not have even needed to read this article!


No Comment