


How to Use a Fuel Pressure Tester
How to Use a Fuel Pressure Tester
Fuel – it is the juice that makes your car go. But did you know the pressure it is delivered at matters? Below, we talk about why fuel pressure is important, what fluctuations may mean, and how to test it.
Why Fuel Pressure Is Important
Your vehicle’s engine requires four things in order to operate correctly: fuel, compression, air, and an ignition source. When even just one of these things is missing or faulty, your engine suffers. Continued wear on an engine that is not able to properly operate leads to engine failure.
However, simply having these four elements is not the only thing that affects your engine’s performance. Fuel must be delivered to your engine at a very specific pressure and volume. Failure to do so can cause serious internal damages to your engine.
Fuel Pressure Issues & Impacts
When your fuel pressure is too low or too high, it is an indication that something is going wrong. Further diagnosis of your system may help to pinpoint the exact cause of the pressure decrease or increase.
There are several things that can affect the appropriate delivery of fuel to your engine. Aside from an empty gas tank, these include:
- Incorrect wiring to the fuel pump;
- Low voltage being provided to the fuel pump;
- Cracked or clogged fuel lines leading from the fuel pump to the engine;
- A failing or failed fuel pressure regulator; and/or
- A defective fuel pump relay.
When you take your vehicle to a reputable mechanic for a tune-up, they should automatically test your fuel pressure. However, not every mechanic does this. Luckily, there are several indicators that can warn you of a fuel pressure issue before more serious problems arise with your engine. These include:
- A sudden lack of power while going uphill;
- A lack of power while towing an object;
- Backfiring while attempting to accelerate;
- Decreasing, poor fuel efficiency; and/or
- Mileage that appears to be beyond the norm for your vehicle.
If you have noticed any of these signs, it might be time to take a look at your fuel pressure.
How to Use a Fuel Pressure Tester
Testing your fuel pressure may be easier than you realize.
Step 1: Determine Your Fuel Type
Before you buy the fuel pressure tester, you need to determine what type you need. If your vehicle is carbureted, you will need a tester meant for it. Most vehicles, however, are fuel injected. For the sake of this article, we will focus on the fuel injected style testers.
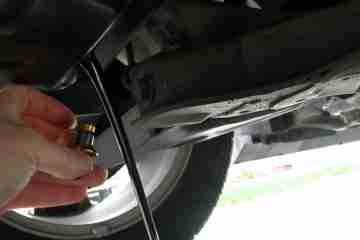
Step 2: Park & Inspect the Vacuum Line
Park your vehicle on flat ground and turn the engine off. (For safety reasons, you can engage your emergency brake as well.)
Open the hood of our car to locate the vacuum line. The vacuum line will be attached to the fuel pressure regulator. Remove the line from the fuel pressure regulator. The vacuum line should be free of any fuel. If fuel is observed dripping from or in the line, it is a clear sign that your regulator has failed.
After inspecting the vacuum line, reconnect it to the fuel pressure regulator.
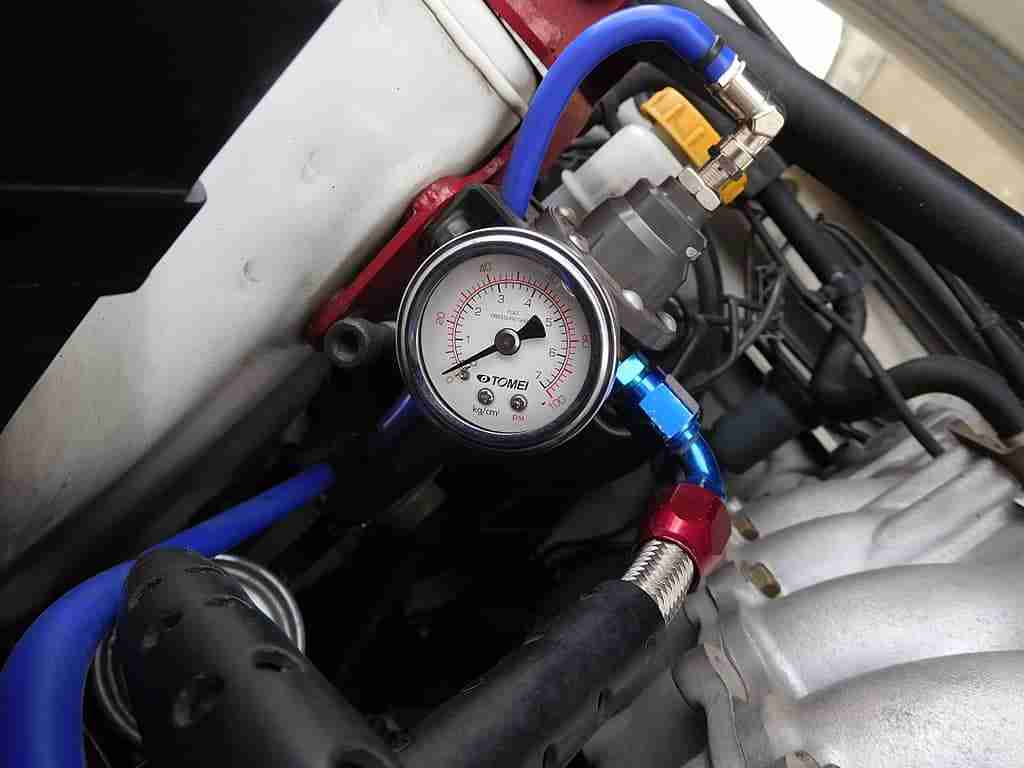
Step 3: Connecting Your Fuel Pressure Gauge
With your fuel pressure regulator and vacuum line reconnected, it is time to break out that fuel pressure gauge. Most vehicles now include a test port expressly for the use of a fuel pressure gauge. If not, a fuel filter adapter will be needed. (A fuel filter adapter connects to or replaces the fuel filter component for testing purposes. Do not leave it connected during regular use of your vehicle.)
Assuming you have a test port, remove the protective cap. Connect your fuel gauge line to the test port.
Step 4: First Test (Ignition On)
You are now ready for the first test. Turn the ignition key to the “ON” position. If you have a direct port inject system, or DPI, the gauge should display a reading between 45 psi and 58 psi. For throttle body inject (TBI) systems, it should read between 13 psi and 17 psi. Should your gauge reading reflect this, it means your pump and electrical portion of the fuel system is working properly.
Note: If the gauge does not react, you will need to check the pump relay and fuse. These are contained in the power distribution center. It may also indicate a fuel pump power feed wire disconnect. Using your service manual, you will need to locate the correct wire in your wiring harness. Ground this wire and test it. Having a helper turn the engine over, will give you one of two outcomes. If the probed light illuminates and your pressure gauge still does not show a reading, the fuel pump has failed. If the light does not illuminate and the gauge remains still, the fuel pump relay or wiring circuit has failed.
Step 5: Second Test (Run the Engine)
With the engine running, our fuel pressure gauge should show roughly a 5 psi drop. If you rev your engine, the pressure should in turn jump about 5 psi. In doing so, it verifies that the fuel pressure regulator is working as it should. If not, check to see if the vacuum line was reattached correctly. If the line was properly reattached, then the lack of appropriate dips and spikes in your gauge readout indicates a failed regulator.
Step 6: Third Test (Operational Loads)
When your engine is engaged and you are at a constant rate of speed, it is referred to as being “under load”. In an ideal world, the gauge will remain the same as when you started the engine. However, a slight drop is also acceptable. If the fuel pressure does drop a bit while under load or idling, the likely culprit is a clogged fuel filter. If the drop is large, the fuel pump has likely failed.
Step 7: Removing the Fuel Pressure Gauge
When you have finished your testing, it is time to remove the fuel pressure gauge. You should note that some fuel will likely leak out while remove the gauge. To help prevent spillage, grab a shop towel before proceeding. Placing or holding the shop towel under the test port, loosen and remove the pressure hose. After that, replace the protective cap over the test port. Inspect the area for any leaks before closing the hood.
Step 8: Refer to the Manual
Most vehicle service manuals list the specific pressure, or pressure ranges, your auto should hit during each of the pressure tests. Compare your results to these industry standards for your specific make and model.
When to See a Mechanic
Not all fixes are easy. For some, it may be best to take your vehicle to a mechanic after experiencing any negative test results. If you are unsure of how to test your fuel pressure or do not feel comfortable doing so, ask a reputable local mechanic to do it for you.
Certain parts and repairs may be costly. However, the sooner you address a fuel pressure problem, the better. As stated before, fuel issues can lead to serious engine problems. Replacing or repairing a part of your fuel system may not be cheap, but it will appear so if you need to rebuild or replace your entire engine without it.


No Comment