How to Reattach a Rear View Mirror
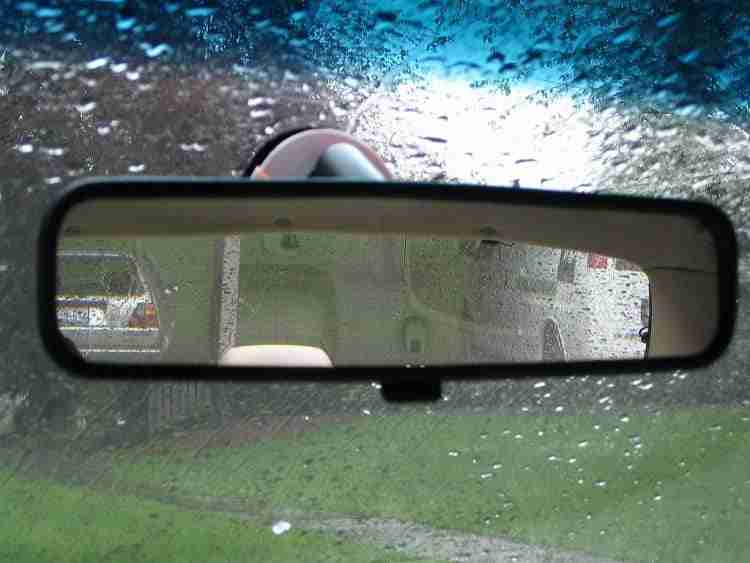
Did you know that your rearview mirror is simply glued on? No, it’s not a manufacturing default, it’s how most vehicles are designed. The adhesive used to hold the mirror in place is strong enough to weather normal wear and tear but sometimes it still falls off.
You can always take the vehicle and rearview mirror to your local mechanic. They’ll have it back on in minutes, except it typically comes with a bill not always covered by insurance. If you want to save money, you can turn it into a DIY project.
Even if you’ve never worked on a vehicle before, you can reattach a rearview mirror. It won’t take long and it’s also one of the easiest vehicle repairs.
How to Reattach Your Vehicle’s Rear View Mirror
If you have an afternoon and want to be able to tell people that you “worked on your vehicle” here’s how to reattach the rearview mirror.
Get the necessary materials
Reattaching your rearview mirror requires something stronger than Elmer’s glue. Luckily, everything you’ll need is at the neighborhood auto parts store. You should be able to find a rearview mirror adhesive kit. You can also order one online if you don’t mind the day or so wait.
The kit includes everything you need to do the project yourself. It even comes with a set of simple instructions. In the kit, you’ll get,
- Industry-strength glue (designed for automotive use)
- Drying-accelerant (helps the glue cure faster)
Along with the kit, you’ll need a few other items. Some you might have at home and others are inexpensive purchases.
- Razor-blade style scraper
- Small Allen wrench (must fit the mirror’s baseplate screw)
- Masking tape
- Tape measure
- Blow dryer/heater (in colder temperatures)
Pick a work location
There will be fumes from the adhesive and dying accelerant that can include methacrylic ester, acrylic acid, and trichloroethylene so you’ll want to pick a well-ventilated area. Your garage is fine as long as you have continuous airflow.
You also want to think about the outside temperature. The adhesive dries faster in warmer weather. A heater or blow/hairdryer will help speed up the drying process, however, if the windshield is cold the glass could crack from the sudden blast of heat. To avoid this, always keep the heat source 12 – 18 inches away from the glass.
Clean the windshield
Before you reattach the mirror you need to clean the windshield. This includes removing any old adhesive. However, first, you need to mark the spot where the old mirror was. If there isn’t any residue or if you forget to mark the spot before cleaning, use the tape measure to find the window’s halfway point.
It’s easier to scrap the old adhesive off when it’s warm. You can use a blow dryer at a safe distance – for a few minutes to soften the glue – or park the car in the sun for a while. Once you’ve scrapped it off, use a glass cleaner and a clean cloth to wipe the windshield down.
You also want to clean the mirror baseplate with isopropyl alcohol. This will ensure that the adhesive adheres to both the windshield and the baseplate.
Apply the accelerant
It’s easier to reattach a rearview mirror if it’s removed from the baseplate. It will be less awkward, especially for first-time mechanics. Using the Allen wrench, remove the screw holding the mirror to the baseplate. It will be a breeze to reattach later.
Liberally coat the baseplate with the accelerant and the same for its mounting spot on the windshield. Do not touch either one as the accelerant is dying. It usually takes around 5 – 7 minutes to dry. Remember, the temperature does affect drying time so it might be longer in colder climates.
Use the adhesive
When the accelerant is dry thoroughly coat the baseplate with adhesive. You don’t want to go overboard but it is important to cover the entire surface area of both places. Once the areas are cover, press the baseplate firmly to the windshield. Press down on the baseplate to ensure that the adhesive is adhering to the glass. You’ll want to apply pressure to the baseplate for about two minutes.
After a couple of minutes, the adhesive has begun to set, and now it needs to cure. At a minimum, in ambient temperatures, this will take 15 minutes. An external heating source, like a blow dryer, can speed up the curing process but it is important to keep it at least one foot away from the windshield, especially if it’s cold outside.
If it’s at all possible let the adhesive dry overnight before reattaching the mirror to the baseplate.
Reattaching the mirror and cleaning up
Once the adhesive has dried there might be excess glue on the windshield. The razor-blade style scrapper can quickly remove it. You do want to be careful and not accidentally scrap under the baseplate or you’ll be reattaching it again.
If the excess residue left streaks, glass cleaner and clean cloth will easily get rid of them. Once again, be careful how close you spray next to the baseplate. It’s safer and easier to spray the cloth with cleaner than the windshield.
To reattach the mirror place it on the baseplate and use the Allen wrench to lock the attaching screw into place. Be careful not to pull on the baseplate when reattaching the rearview mirror. Once the rearview mirror is reattached, adjust it to your preferences.
Conclusion
In just a few hours you can save money and boast about spending time ‘working on your car’. It’s easier than you might think to replace a vehicle’s rearview mirror, whether you drive a compact car or a heavy-duty pickup.
The most important thing to remember is to not rush the curing process. You also want to be careful if you’re using an external heating source. Otherwise, first-time mechanics won’t have any problems reattaching their rearview mirrors as well as a professional.








No Comment