


How to Break the Bead on a Tire
Whether it is a car, truck, or ATV, one of the trickiest parts of DIY vehicle maintenance is changing a tire. To change a tire on any of these vehicles, you must first break the bead of the tire.
A tire bead is a term that is used to describe the edge of the tire that sits snugly on the wheel. Most wheel hubs will have a small slot or a groove with which the tire bead will slip into. If the tire is inflated correctly, the pressure of the air pushing against the walls will keep the tire bead inside this groove.
The tire bead on an automobile tire is made of a steel ring that is molded into the rubber. If it weren’t for this ring, the tire would just roll off the rim when inflated.
The inner edge of the rim forms a tight fit when inflated. This fit is so tight that you will probably need to use a bead breaker of some sort to get the ring separate from the hub
If you have ever experienced the frustration of an uncooperative tire, you might have a broken ring inside the molded rubber. If this is the case, be very careful. Pressurizing a tire with a broken ring can send it flying off the hub at high speeds.
Before you begin your bead breaking operation, it is essential to follow some safety precautions first.
Safety Precautions
The most important rule when installing or removing a tire is the stand to one side if it is under pressure or being filled up. Do not stand directly in front of in the event the ring fails.
Also, remember that you are responsible for ensuring your safety. If you are unsure about your ability to perform the following procedures, it might be a good idea to find a professional. Catching your fingers in between the tire and rim can hurt a lot and even send you to the hospital, so always exercise caution.
Step 1: Locate the Proper Tools
For this operation, you will need the following tools:
- Tire levers- you will need two or three for this job.
- A scissor jack and a handle to jack it.
- A valve core tool.
- Something very sturdy to jack against.
Step 2: Set Up and Getting Started
First and foremost, you will need to remove the valve core using the valve core tool. Removing the valve core will allow any built-up pressure to escape before moving on to the next steps.
Once you have removed the core, position the wheel underneath your brace. You can use the back axle of a car or something else very sturdy. Position it under the jacking point and set the base of the jack as close as possible to the wheel. The jack needs to be close enough that it will push the tire down with minimum flex.
Step 3: Winding It Down
 Slowly and steadily begin to increase the load amount on the tire. This might be a bit more pressure than you thought you would need, depending on the type of tire. The pressure might pop the bead off all the way around the rim, or just partially. If you get only a partial pop, you will need to repeat the process around in several spots. Don’t be afraid to give it a nudge with a lever.
Once one side is complete, you will need to flip it over and repeat the process. If the wheel is in good condition, you might want to place a piece of old carpet down to keep it from being damaged.
Step 4: Find Some Leverage
This is where having multiple tire levers comes in handy. Use the levers to work the tire around the edge of the rim. Remember that care tires come off to the outside of the wheel due to the design of most wheel well. This technique can also be useful on bike tires, but you will need to block the wheel up first to remove the hub.
Step 5: Tire Fitting
When you fit a new tire on the wheel, you should first add a bit of lubricant to the tire bead. Anything slippery like soft soap or WD-40 will work well. Once the tire is lubed, push it on the rim as far as you can make it go. From there, you can work it on using levers and push it to the outside edge. Leaving the valve core out of the tire will help air get in faster.
Other Tools for breaking the bead
There are numerous ways to break the bead of a tire.
What all of these methods have in common is the use of some sort of tool to aid in the process. Some devices are quite expensive, and other tools are nearly free.
At one end of the spectrum, you have tools that can cost thousands of dollars, such as the quick change machines that shops use. These are quite effective, but out of the price range for the average home mechanic.
At the other end of the spectrum, there are cheaper methods and some other downright dangerous DIY devices.
The Truck or Tractor Method (not recommended)
One of the more creative but ultimately dangerous ways to remove the bead of a large tire is to run over it with a truck or tractor. This might sound like overkill because, in reality, it is. However, it is an entirely free method, provided you own a truck or a tractor.
The basic idea behind this method is to lay the wheel flat on the ground and drive the truck tire over only the tire portion that you want to remove.
There have been several reports of success; however, there is a substantial risk of damaging the rim, or your truck. Overall, this is the most questionable method around.
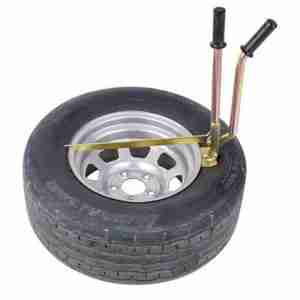
Store-bought tool: A Portable tire changer (Recommended)
 If you are familiar with your neighborhood body shop or auto repair store, you have probably seen some variation of this tool at some point. This tool is relatively cheap and works very well on small or medium-sized tires.
To use this tool, the tire changers need to be bolted to the floor or secured firmly to a heavy object to operate correctly. Also, there is a learning curve for this device.
Many users do report that they will struggle to break the bead of even smaller tires with this device if the bead is seated too well on the hub. The tool will instead just slip down the tire sidewall, leaving the bead intact
If this happens, you run the risk of damaging your tire as well as your ego.
Despite the learning curve, this tool comes recommended because it works once you get the hang of it. They are also quite cheap.
Additionally, there is an expert trick that will give this device the edge it needs to break a bead.
To prevent the tool from slipping down the sidewall, leave just a little air inside the tire. Just enough to give it some form, around 3 to 5 PSI. The shape of the tire will provide you with a little more room to apply a bit more pressure to the bead before the tool starts to slip.
This can mean the difference between a failed attempt and success.
You should also spray the bead with some lubricant, as mentioned previously.
However, even if you utilize these tips and tricks, you still may find it unnecessarily difficult to remove a stubborn bead. If you are still struggling, you might consider using the best tool there is.
The Bead buster (Recommended, Best)
The company’s name is BeadBuster, and they manufacture a tool that will clamp onto the rim itself and force a wedge in between the tire and the rim. All you need to do is rotate a bolt to push the bead down and pop it over the retainer.
This tool operates with one huge advantage compared to the other devices. It does not apply pressure to the tire’s sidewall; instead, it puts pressure directly on the tire bead.
This will reduce the change of unwanted damage to the tire or wheel.
The force is created by twisting the tightening-bolt, which should provide enough torque to break even the toughest bead. Also, though this tool is easy to use and relatively safe, it comes with a hefty price tag. The only better option is to hire a professional to break the bead for you.
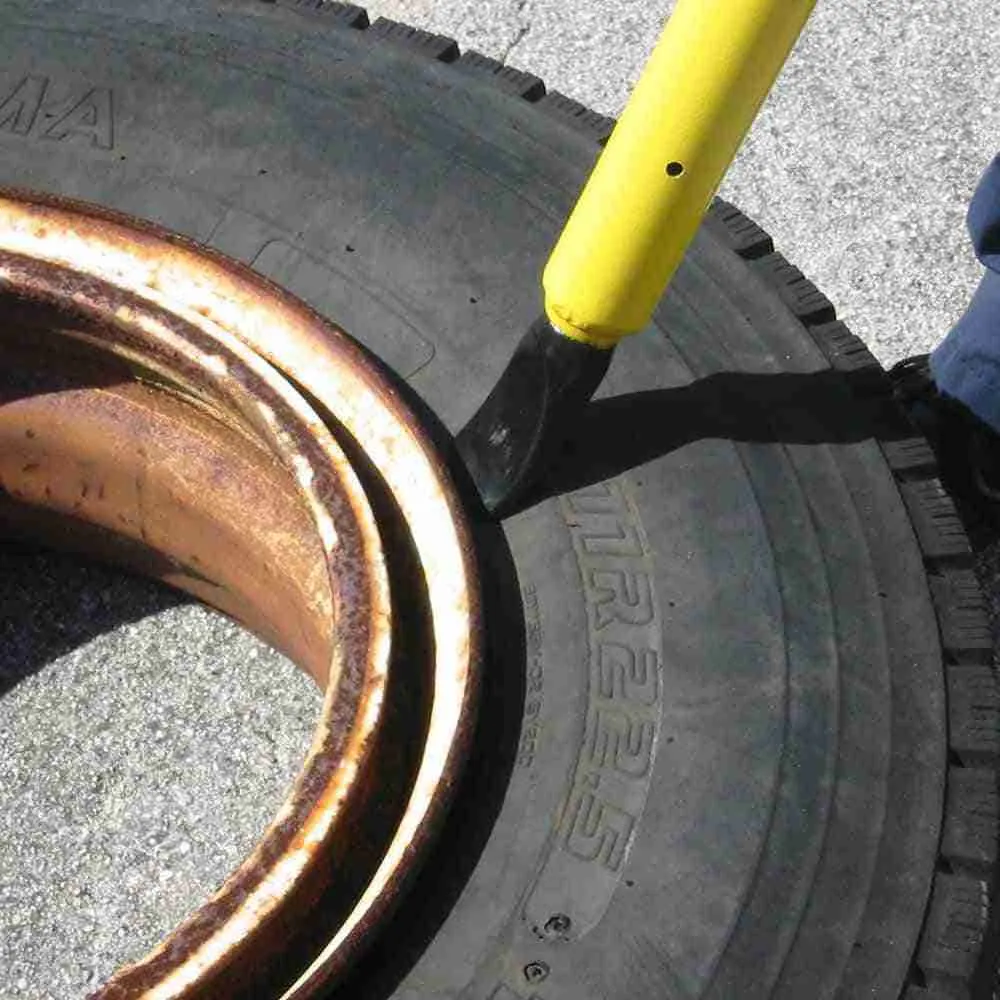
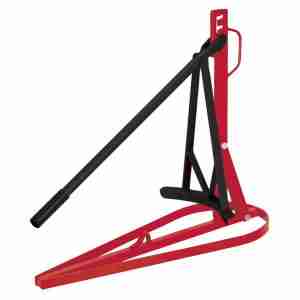
Tire Pliers
Your final option for bead breaking can be just as effective as the aforementioned portable tire changer. These pliers work by thrusting a wedge in between the tire and the rim, but this tool uses a long handle to lever down the wedge.
Conclusion
Whatever tool you choose for the job, be sure to exercise caution, and always follow safety measures. Breaking the bead to a tire can be a frustrating task, but don’t give up. If one method does not work, move on to the next one. Also, don’t be afraid to apply a little elbow grease first.


No Comment