


DIY Guide: How to Change the Air Filter on Your BMW X5
Change the Air Filter on Your BMW X5
You’ve been noticing the air coming out of your BMW X5’s vents isn’t as cool or fresh as it used to be. It’s time for a new air filter, but those BMW service center charges are enough to make your wallet overheat. Don’t worry, you’ve got this. Changing your X5’s air filter is one of the easiest DIY jobs and will only take about 15 minutes of your time. In a few simple steps, you’ll have your X5 breathing easy again and a few more dollars in your pocket. This handy guide will walk you through locating your X5’s air filter housing, removing the old filter, installing a new filter, and putting everything back together. Before you know it, you’ll be cruising down the road with cool, clean air blowing at your face again. BMW ownership doesn’t have to mean pricey dealer-only service. Tackle it yourself and you’ll gain a new appreciation for your X5 and a new skill to boot. You’ve got the tools and the talent, so let’s get started!
Why Change Your BMW X5 Air Filter Regularly?
Your BMW X5 relies on clean air filters to function properly. Dirty, clogged air filters reduce airflow to the engine and cabin, negatively impacting performance, fuel economy, and your driving experience.
Replacing your BMW X5’s air filters once a year or every 12,000 miles is critical to keep your vehicle running strong. Fresh, clean air filters allow for maximum airflow so your X5’s engine can breathe easily and operate efficiently. Unrestricted airflow also means optimal heating and cooling in the cabin to keep you and your passengers comfortable in any weather.
Dirty air filters fill with debris like dust, pollen, and pollutants over time. As airflow is restricted, your X5 has to work harder, reducing power and acceleration. You may also notice the ‘check engine’ light coming on or strange noises from the engine compartment. In severe cases, contaminated air filters can even damage internal engine components from lack of proper airflow and overheating.
While replacing your BMW X5’s air filters is a straightforward DIY task, it’s not worth risking potential damage to your vehicle by delaying the job. New air filters only cost around $30 to $60 and take just 30 minutes of your time. Think of it as cheap insurance to protect your investment and keep your X5 running like new for years to come. Your BMW will thank you for it!
When to Change the Air Filter on a BMW X5
If your BMW X5 has racked up 30,000 miles or more, it’s probably time for a new engine air filter. Replacing it yourself is easier than you might think and will save you money versus paying a dealer.
When to Change the Air Filter on a BMW X5
As a rule of thumb, you’ll want to swap out the air filter on your X5 every 12,000 to 15,000 miles for the best performance. If you drive in dusty or polluted conditions often, you may need to change it more frequently, around every 10,000 miles. The signs it’s time for a new air filter include:
- Reduced acceleration. If your X5 seems sluggish, an old air filter could restrict air flow to the engine.
- Strange noises. If you hear whistling, squealing, or rattling sounds from the engine, the air filter may be damaged or clogged.
- Check Engine light comes on. A faulty air filter can sometimes trigger the Check Engine light to illuminate.
- Musty smells. If you notice musty, moldy smells coming from the vents, your air filter has likely become damp or damaged and needs replacement.
To check your X5’s air filter yourself, locate the air filter housing in the engine bay on the passenger side. Release the clips or screws holding on the housing cover, then remove the old air filter inside. Be sure to vacuum out any debris in the housing before installing a new air filter, then reassemble everything.
Replacing your X5’s air filter is an easy DIY job that will help your engine breathe better and last longer. So check it regularly and change it every 10,000 to 15,000 miles for optimal performance. Your BMW will thank you!
What You’ll Need to Change the Air Filter
To change the air filter on your BMW X5, you’ll need to gather a few basic supplies.
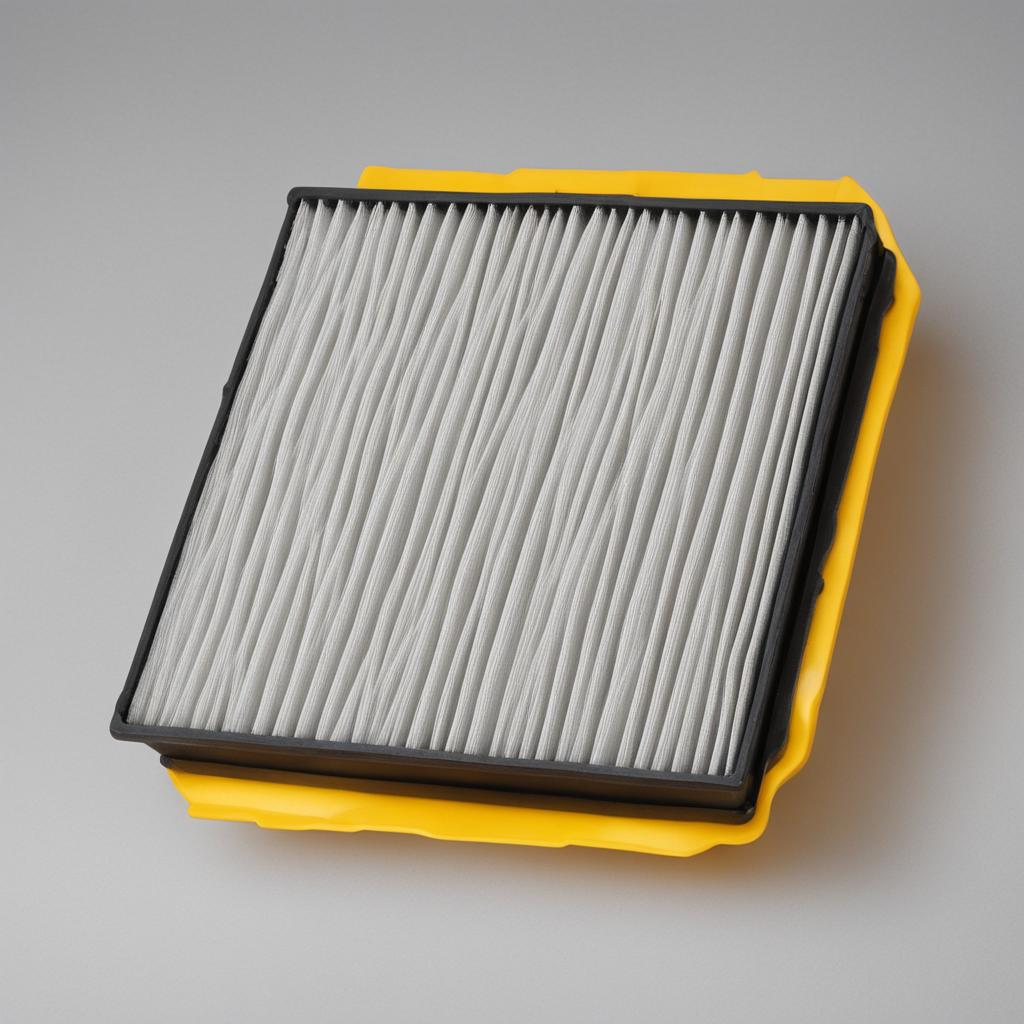
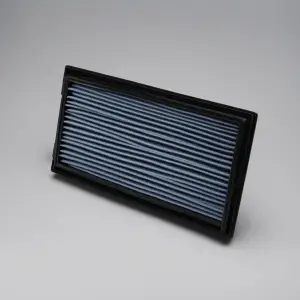
Replacement air filter
Purchase a new air filter that specifically fits your BMW X5 model and engine size. For most X5s, you’ll want a panel-style filter. Check your owner’s manual for the correct part number.
Screwdrivers
Bring a flathead and Phillips screwdriver in a variety of sizes. The screws and clips holding the air filter housing together may require different types.
Gloves (optional)
Wearing gloves can help keep your hands clean during the repair. Mechanic’s gloves or disposable gloves will work fine.
Resealable bags (optional)
Have some resealable plastic bags on hand to store any screws or small parts you remove. This prevents them from getting lost while you work.
Flashlight (optional)
A compact LED flashlight can help illuminate the area around the air filter housing. The location may be in a tight space, so extra light is helpful.
With these basic tools and parts in your garage, you’ll have everything needed to change the air filter yourself in about 30 minutes. The process involves removing a few screws and clips to open the air filter housing, pulling out the old filter, placing in the new filter with the airflow arrow pointing in the correct direction, then reassembling the housing.
Double-check that all tools, parts, and the new air filter are accounted for, then you’re ready to start the repair. Changing your air filter is a simple way to save money on routine maintenance for your BMW X5. Follow the steps carefully, and before you know it, you’ll be back on the road breathing fresh, clean air.
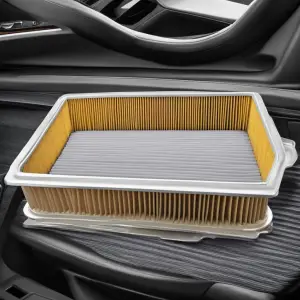
Locating the Air Filter Housing on a BMW X5
To change the air filter on your BMW X5, you’ll need to locate the air filter housing. This is the component that holds the air filter in place. On the X5, the air filter housing is located in the engine bay on the passenger side of the vehicle.
Accessing the Engine Bay
To access the engine bay, pop the hood release lever located on the driver’s sidekick panel. Then, go to the front of your X5, lift the hood, and secure the hood prop rod in the proper slot to keep the hood open.
Locating the Air Filter Housing
Once you have the hood open, you’ll see a large black plastic housing on the passenger side—this is your air filter housing. It will have “Luftfilter” printed on the top, which is German for “air filter.” The housing has clips or bolts, depending on the specific X5 model year, that secure the lid in place.
Releasing the Housing Clips or Bolts
For models with clips, simply release the clips by pulling up on the center section of each clip. The lid should then lift off easily. For models with bolts, use a socket wrench to loosen the bolts in a counterclockwise direction. Don’t remove the bolts completely, just loosen them enough so you can lift off the lid.
Be very careful working in the engine bay, as there are many hot components. Only do this when the engine has fully cooled to avoid burns. Now that you’ve located the air filter housing and released the securing clips or bolts, you’re ready to remove the old air filter and install a new one. Take your time and double-check that the new filter is the proper type and size for your X5’s specifications.
Putting in a new air filter yourself can save you money versus paying a shop to do it. And by keeping your X5’s air filter clean, you’ll ensure maximum engine performance and efficiency. Just be sure to dispose of your used air filter properly according to your local regulations.
Removing the Old Air Filter
To remove your old air filter, you’ll need to locate it under the hood. On the X5, the air filter housing is on the passenger side of the engine bay.
Opening the Air Filter Housing
Pop the hood and locate the air filter housing on the right side of the engine compartment. You’ll see a large black rectangular plastic casing—this houses your air filter. Loosen the clips or screws around the edges of the housing to open the cover. Be very careful when opening the housing, as the cover can be stuck on tight. Gently pry around the edges to loosen it.
Once the cover is off, you’ll see the old air filter inside. It will likely be dirty and clogged, reducing airflow to your engine. Removing this used filter is an important part of routine maintenance for your X5.
Removing the Air Filter
Reach in and pull out the old air filter. It may take some wiggling to fully remove it, as it’s designed to fit snugly within the housing. Be sure to remove the filter evenly without ripping or tearing it. Double-check that no debris falls into the air filter housing when you remove the old filter.
Give the inside of the housing a quick wipe down with a clean rag to remove any excess dirt or dust. Now you’re ready to install a fresh, high-quality air filter to provide clean air to your X5’s engine.
For the best performance and engine protection, replace your X5’s air filter once a year or every 12,000 to 15,000 miles. A clean air filter is essential for proper airflow and combustion in the engine. Neglecting to change the air filter regularly can reduce power and fuel efficiency, and allow damaging particles into the engine.
So get out there and give your X5 some fresh air—you’ll be breathing easy knowing its engine has a steady supply of clean, filtered air keeping it running strong. Your BMW will be humming along happily, the picture of health with its new high-performance air filter installed.
Inspecting the Air Filter Housing
To inspect the air filter housing in your BMW X5, here are the steps to take:
Locate the Air Filter Housing
The air filter housing is typically found in the engine bay on the passenger side of the vehicle. Locate the large, rectangular plastic housing with air intake tubes connected to it. This is your air filter housing.
- Release the clips or screws that secure the air filter housing cover in place. This may require a screwdriver or socket wrench to loosen.
- Carefully lift off the air filter housing cover. Be cautious, as there may be debris collected inside.
- Examine the inside of the air filter housing for any dirt or damage. Wipe away any large debris with a clean rag. Check that the air intake tubes connected to the housing are also clear and securely fastened.
- Inspect the air filter itself. If it looks overly dirty or damaged, it’s best to replace it. A clogged or torn air filter will restrict airflow to the engine and reduce performance.
- Put the cover back on the air filter housing and securely fasten all clips or screws. Double-check that the cover is on properly and airtight.
- Start your BMW X5 and listen for any abnormal noises coming from the air filter housing area. If all sounds normal, your inspection is complete.
- For the best performance and engine health, it’s recommended to replace your BMW X5’s air filter every 12,000 to 15,000 miles. Be sure to inspect the air filter housing each time you replace the filter.
By periodically inspecting your air filter housing, you can catch any issues early on and ensure maximum airflow to keep your BMW X5 running at peak performance. Letting contaminants build-up or damage go unnoticed can reduce engine power, accelerate wear, and potentially cause more serious problems down the line. An ounce of prevention is worth a pound of cure!
Installing the New Air Filter
Now that you have the new air filter in hand, it’s time to install it. This is quite straightforward to DIY and will only take about 15-20 minutes.
Remove the Old Air Filter
Pop the hood and locate the air filter housing on the driver’s side of the engine bay. Release the clips or screws holding the air filter cover in place and lift off the cover. Pull out the old, dirty air filter—it will be a rectangular panel that fits into a slot in the housing. Discard the used filter properly according to the directions on the packaging.
Install the New Air Filter
Take the new air filter out of its packaging and inspect it to ensure it’s clean and undamaged. The filter media should fill the entire filter frame and not have any tears, holes, or dents. Line up the new filter with the slot in the air filter housing, then slide it in until it’s fully seated.
Replace the air filter cover and secure all clips or screws. Double-check that the new air filter is fitted properly and the cover is firmly attached with no gaps. Start the engine and listen for any strange noises. If everything sounds normal, you’re all set!
Performing regular air filter replacement is important to keep your X5 running strong. A fresh, clean air filter allows for maximum airflow to the engine and prevents contaminants from entering the system. Most manufacturers recommend changing your air filter every 12,000 to 15,000 miles for the best performance and gas mileage.
Now you can feel good knowing you’ve given your BMW a quick DIY tune-up. Drive safely and enjoy the road ahead! Let me know if you have any other questions about maintaining your vehicle.
Reassembling the Air Filter Housing
Now that the old air filter is out, it’s time to put everything back together. This is the easy part!
Reinstall the Air Filter Housing
Line up the air filter housing so the arrow on the housing cover points towards the front of the vehicle. Place the housing back into position in the engine bay, making sure all hoses and wiring connectors are routed properly and not pinched.
- Secure the air filter housing in place by reinstalling the bolts you removed earlier. Tighten the bolts securely with the socket wrench.
- Reconnect the mass air flow sensor electrical connector by plugging it into the port on the air filter housing. Make sure it clicks into place firmly.
- Reattach any hoses to their proper ports on the air filter housing. Double-check that all connections are tight to prevent air leaks.
- Put the engine cover back on, lining up the tabs and slots. Press down firmly around the edges of the cover to secure it in place.
Start the Engine
- Get into the driver’s seat and start the engine. Let it idle for a few minutes. This helps the new air filter get settled in and also allows you to check for any unusual noises that could indicate remaining issues.
- Go for a short test drive to ensure everything is working properly. If there are no noticeable issues, your BMW X5 should be all set to go with its new air filter installed!
Performing regular maintenance like replacing the air filter yourself can save you money and help keep your X5 running strong. Be sure to note the date you installed the new filter so you know when it’s time for the next replacement in about 12,000 to 15,000 miles. Taking good care of your vehicle with routine DIY care will help ensure many more miles of enjoyable driving.
DIY Air Filter Replacement on a BMW X5 – Frequently Asked Questions
DIY Air Filter Replacement on a BMW X5 – Frequently Asked Questions
Changing your air filter on the BMW X5 is doable as a DIY project, saving you time and money. However, you probably have a few questions before getting started.
- Do I need any special tools?
The only tools required are a Phillips head screwdriver and a flathead screwdriver. BMW thoughtfully designed the X5 to allow easy access to the air filter without needing special BMW tools or equipment.
- Where is the air filter located?
The air filter on the BMW X5 is located behind the glove compartment. You’ll need to remove the glove compartment to access the air filter housing.
- How often should I replace the air filter?
For the best performance and fuel economy, BMW recommends replacing your X5’s air filter every 12,000 to 15,000 miles. If you drive in dusty or polluted conditions often, you may need to replace it more frequently, around every 10,000 miles. An air filter that’s dirty or clogged won’t filter the air well and can reduce your gas mileage.
- What brand of air filter should I use?
BMW recommends using a high-quality air filter that meets the vehicle’s specifications. Well-known brands like Mann, Bosch, or Mahle are all good options. Avoid cheap, generic air filters that may not fit properly or filter effectively. For the X5, you’ll want an air filter with the part number 63126939473 or equivalent.
- How long will it take me to change the air filter myself?
Replacing the air filter on an X5 typically takes between 30 to 60 minutes for someone with basic mechanical skills and experience working on vehicles. The exact time will depend on your familiarity with the X5 and comfort level with DIY repairs. Take your time and follow the steps carefully. Rushing can lead to mistakes or improper installation of components.
Changing components like the air filter is a great way for X5 owners to become more familiar with their vehicle’s maintenance needs and save money. With some basic tools and patience, you’ll be cruising with a new air filter in no time. Let me know if you have any other questions!
Conclusion
So there you have it, a step-by-step guide to changing the air filter on your BMW X5 yourself. While it may seem intimidating to work under the hood of such an advanced vehicle, this is a straightforward job you can easily tackle in about 15 minutes. Save yourself the time and money of going to the dealership and getting your hands dirty – you’ll feel a sense of accomplishment and your X5 will be breathing easy again. Next time that ‘replace air filter’ warning pops up on your dash, you’ll know exactly what to do. You’ve got this! Now get out there and give your X5 some fresh air.


No Comment