

Combatting Wheel Well Rust: A Comprehensive Guide
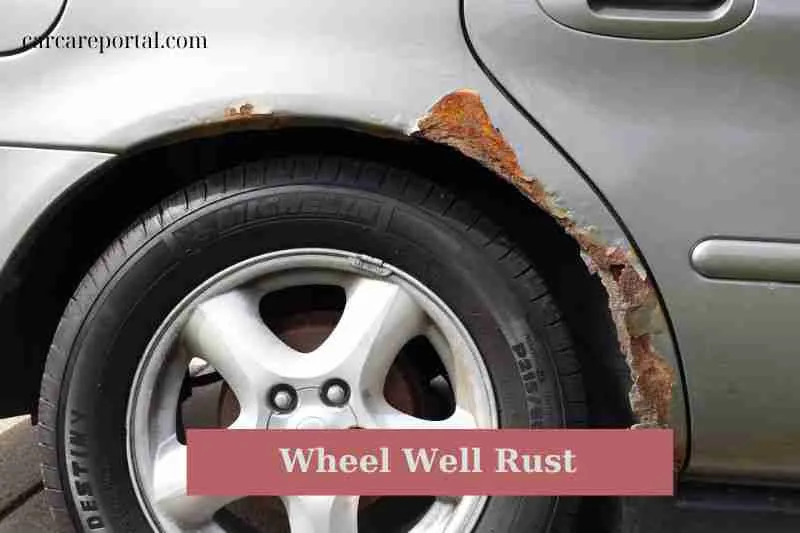
Rust around the wheel wells is a common issue that many car owners encounter, especially those who live in regions with harsh weather conditions, salted roads, or high humidity.
Often starting as a minor cosmetic annoyance, this corrosion can quickly evolve into a structural concern if not properly addressed.
The wheel wells are particularly susceptible to rust due to their proximity to the ground, which makes them a prime target for water, salt, and road debris.
Understanding the causes and preventive measures for wheel well rust is essential for long-term vehicle maintenance and can save you from costly repairs down the line.
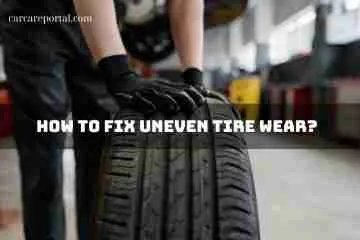
How to Fix Rust Around Your Wheel Wells
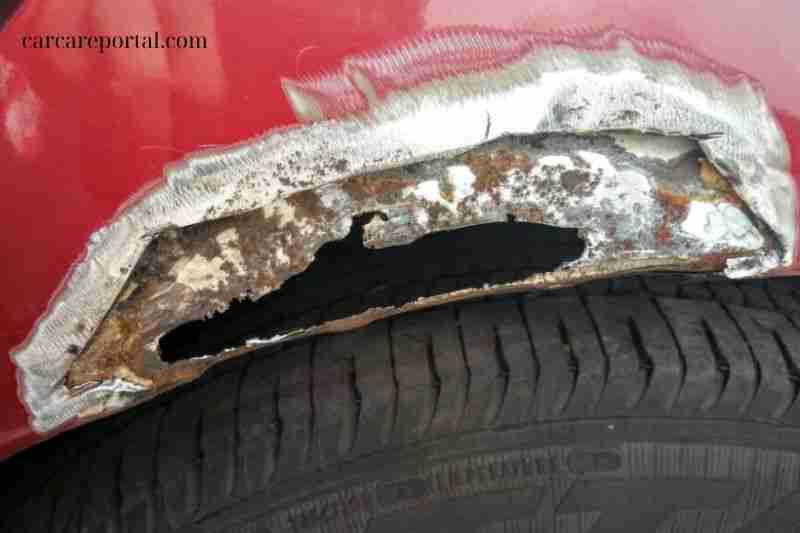
Repairing rust around wheel wells is an important task for prolonging the life of your vehicle and preventing further damage.
Before beginning, it’s crucial to have the right tools and materials on hand, and ensure you’re comfortable with the task or consult a professional for help. Here’s a simplified guide to help you tackle this issue:
Materials Needed:
- Safety goggles
- Dust mask
- Gloves
- Wire brush or rotary tool with a wire wheel attachment
- Sandpaper (various grits)
- Auto body filler (also known as Bondo)
- Rust converter
- Primer
- Paint (matching your car’s color)
- Clear coat
- Painter’s tape
- Newspapers or plastic sheeting
- Spray gun or paint brushes
- Cleaning rags
- Soap and water
Steps:
- Safety Precautions: Wear safety goggles, a dust mask, and gloves to protect yourself from rust particles and fumes.
- Preparation: Clean the area around the wheel wells with soap and water to remove dirt and grease. Allow the surface to dry completely.
- Remove Loose Rust: Use a wire brush or a rotary tool with a wire wheel attachment to remove any loose rust from the affected area.
- Sanding: Use sandpaper to sand down the rusty area until you reach bare metal. You may need to use different grits, starting with coarse and working your way to fine for a smooth finish.
- Apply Rust Converter: This helps to neutralize any residual rust. Follow the manufacturer’s instructions for application and drying times.
- Body Filler: If the rust has caused pits or holes, apply an auto body filler (Bondo) to level the surface. Follow the manufacturer’s instructions for mixing, applying, and sanding the filler.
- Primer Application: After the filler has dried and the area is sanded smooth, apply a coat of primer. Allow the primer to dry according to the manufacturer’s instructions.
- Painting: Mask off the surrounding areas with painter’s tape and newspaper or plastic sheeting to avoid overspray. Apply the paint in thin coats, allowing each coat to dry before applying the next. Make sure the paint matches your vehicle’s existing color.
- Apply Clear Coat: After the final coat of paint has dried, apply a clear coat to seal and protect the new paint. Allow it to dry as per the manufacturer’s guidelines.
- Final Inspection and Clean-Up: Once everything is dry, remove the painter’s tape and any protective sheeting. Inspect your work to make sure you’re satisfied with the result.
Remember, if you’re not comfortable with any part of this process, it may be best to consult a professional for this repair.
Create A Regular Cleaning Schedule
Even though wheel wells might be out of sight, they’re still vulnerable and need regular care to stave off rust. Implement a weekly cleansing routine that includes a thorough rinse of the underbody to remove any debris accumulated over the week.
In addition, consider applying an undercarriage protective spray after brushing away any loose particles. This will maintain a continuous shield against dust, dirt, and grime, prolonging the life of your rustproofing.
How much does it cost to repair wheel well rust?
The cost of repairing rust around wheel wells can vary widely depending on a number of factors:
- Severity of the Rust: Minor surface rust can be relatively inexpensive to fix, perhaps a few hundred dollars. More severe rust that has penetrated deeper into the metal or has caused holes may require more extensive repairs, driving up the cost.
- Location and Accessibility: Some wheel wells are easier to work on than others, and this can affect labor costs.
- Labor Rates: The cost of labor can vary by region and by repair shop. In some areas, labor can run upwards of $100 per hour.
- Materials: The cost of materials like primer, paint, body filler, and rust converter also adds to the overall expense.
- Additional Services: If you opt for additional services like professional rustproofing, expect to pay more.
- DIY vs Professional: Doing the repair yourself can save money on labor but might not yield professional results, and you’ll still need to purchase materials.
As a general ballpark figure, for a professional repair you might expect to pay anywhere from $200 for minor surface rust repairs, to over $1,000 for more severe damage that requires the removal and replacement of panels.
Always get multiple estimates from reputable repair shops to understand your specific costs better, and remember that opting for the cheapest repair may not provide the best long-term solution for your vehicle.
Note: All prices are indicative and may vary depending on various factors. It’s best to consult directly with professionals for accurate pricing.
Read also:
Emerging from Hibernation: A Comprehensive Spring Car Maintenance Guide

No Comment