How to Replace Jumper Cable Clamps
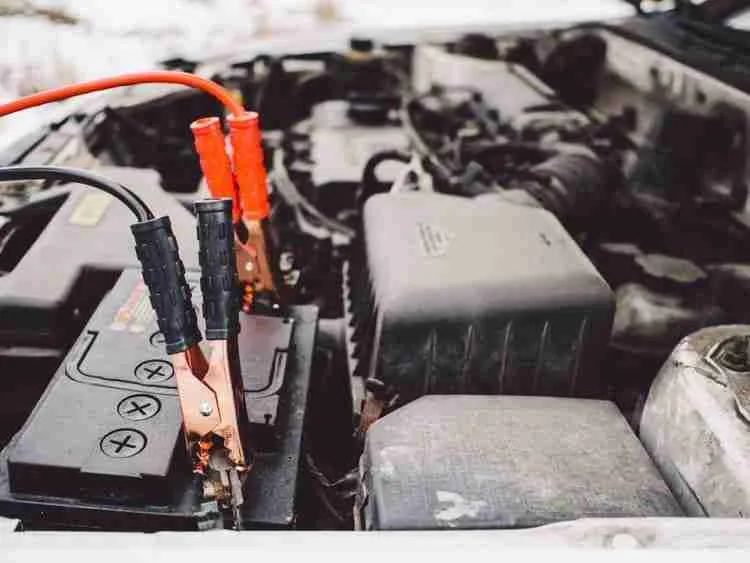
Jumper cables are a necessary piece of hardware for anyone who drives. They allow you to take power from one conduit and put it into another so that you may be on your way. Sometimes the jumper cables need to have their clamps changed. This can be because of wear and tear, snapped clamps, or because they were damaged in some way.
Replacing clamps on jumper cables is not too hard but it does require a few tools. It will also require a basic knowledge of how jumper cables connect to the clamps, along with the different clamp options.
The first step to replacing jumper cable clamps is to choose your clamps. There are many options, but the first thing to remember is to always make sure the handles are rubber coated, and that you have two red and two black. That will help you differentiate which clamp goes to which terminal since you need one on each positive terminal and one on each negative terminal.
You need one red and one black clamp on each end to represent the positive and negative terminals. Red represents the positive terminals, and black represents the negative terminals. This is important because misusing jumper cables can be dangerous. You connect the red clamps to each positive terminal first, then you connect the black clamps one at a time. If you were to mix up the clamps or the terminals, you could seriously injure yourself or damage one, or both, of the vehicles involved in the jumping.
Even though there are several different shapes of clamps to choose from, alligator clips are the primary type. The directions on changing these will apply to most other shapes and types.
Replacing Alligator Clips on Traditional Jumper Cables
Tools needed will include a set of strong wire cutters, a small sharp knife, needle nose pliers, a screwdriver, solder and a soldering iron, solder flux paste, and shrink tubing. Make sure the shrink tubing is red and black to match the color of the rubber on the handles.
There are seven steps to replacing jumper cable clamps.
Step one
Remove the old clamps and broken wires first. You will start this by pulling the clamp wings off of the wires. Then you use the pliers and the screwdriver to pull the frayed wires apart and away from each other. That will make it easier to cut through the wires with the wire cutters separately. If any of the wire is soldered together, use your soldering iron to help you separate those pieces. At this point you use the wire cutters to remove the pieces as you separate them. When you get all the frayed wire off you are ready for the next step.
Step two
Determine how much insulation needs to be removed from the wire in order to set the wire into the clamps. Use your knife to cut around the insulation carefully and remove that section. This is anywhere from two to 6 inches, although the average is four. Cut around the wire in a circle, and then cut a line down the center from the end to the circle you already cut. Now you can just peel the insulation off.
Step three
Slide the shrink wrap tubes around the wires so that it will already be in place when you are ready for the last step. Make sure your soldering iron is heating up by this point as well. Be very careful to ensure that the red covers the positive ends of both, and the black is on the negative. The last thing you want to do is mix up the colors and cause injury to yourself or others.
Step four
Now it is time to prepare the wire to put it in to the clamp. Start by coating the ends in the solder flux paste. This will make sure that the wire stays where it needs to be while also conducting electricity through the ends.
Step five
Slide the paste-dipped wire through the middle of the clamps. You can see where to do that when you look between the handles. There is usually a guide leading into the center of the clamp wings. Use the pliers to squeeze the clamp wings around the wire to secure it as much as possible. It would undo all your hard work if they come loose at this point.
Step six
Next put the soldering iron, which should be hot by now, to the ends of the wire and into the center. Allow the heat to transfer for a moment so it can make the wire hot. Once it is hot, pull the iron out of the wire and apply solder to the iron. When the solder begins to melt, you insert it back into the wire, and allow enough to melt that you know you can be confident that there is a secure, solid connection. This can usually take up to a minute or two.
The solder should be melting to silver at this point. If it is not, you need more heat. Continue applying heat until you get that silver color. Repeat the steps for every clamp you need to replace.
Step seven
At this point you can pull the shrink wrap up and over all of the exposed wire. Use a hair dryer or a large lighter to melt the shrink wrap all the way around until you get a nice, fit tight. The shrink wrap should protect you from being electrocuted and also stop the current from damaging things around it.
Replacing Screw on Clamps
Screw on clamps are much simpler than traditional alligator clamps to replace, assuming the old jumper wire is not damaged, and you only need to replace the clamps. Make sure to have the correct size screw on clamps, and again, be sure you have red and black rubber coating on the handles.
Tools needed
All you need to replace these types of clamps is a pair of good pliers. You may need the extra torque power of the pliers to screw and unscrew the nut and clamps.
This is a simple three step job. Again, be very careful to ensure that the red and black rubber coated clamps go on to the right parts of the cables. Red should lead to red, and black should lead to black.
Step one
Remove the old clamps by using the pliers to unscrew the nut away from the connection point.
Step two
Unscrew the actual wire from the old clamp.
Step three
Take the new clamp and screw it on to the wire. Screw the nut on tightly with the pliers to ensure you have secured it well enough. At this point you should be all set and ready to use the wire with the new clamps.
Conclusion
A good set of heavy-duty jumper cables can be very expensive. Throwing away a good pair of cables when you could replace the clamps cheaply and easily will not only be wasting your money, but also time and materials.
You can get the clamps in many shapes. Each shape correlates to a certain job that it does best. For example, regular alligator clips can be used from the top or the sides, so these are a good all-purpose clamp to choose when you will have many different jobs to do. The parrot clamps are best for when the terminals are on the sides, while the mechanic shaped ones can be connected anywhere.
Replacing jumper cable clamps is not hard at all. Once you have the tools and know the steps, anyone can do it. It is always important to keep a heavy-duty pair of jumper cables in your vehicle. It is also important to make sure those cables are always in good repair. If you are looking to get a pair of Jumper cable clamps check out our buying guide.





No Comment